Showing posts with label DIY/Crafts. Show all posts

Tuesday, May 8, 2012

Easy Housewarming Gift

A good friend of mine recently moved into a new apartment and Hadley and I wanted to go check it out!  I brought her a small housewarming gift that I made (thanks to Pinterest!) and thought I’d share it with y’all!

First of all – I have to give credit to my inspiration.  Chelsea at TwoTwentyOne created a B-E-A-U-TIFUL tray/liner, and her pictures and staging look WAY better than mine.  Check out her post here.

And here is my version – (the monogram was supposed to be an aqua blue, but when I had it printed, it came out with more of an aqua-green tint.  The fun thing about this project, though, is that I can make Courtney extra liners to switch out as she pleases!

IMG_5265IMG_5270

I stuck a notepad and matching pen in the tray as well and voila! Instant personalized housewarming gift!  If you’re a close friend and are moving soon, pretend you didn’t see this because I will likely use this idea again!


Pin It!

Friday, April 13, 2012

Friday Phone Dump

Just wanted to share some randomness with y’all from our week!  And if you haven’t already, head over to Karen’s blog and link up your home (or room) tours now that her guest-posting tours are over! 

  • I am super excited about this seersucker dress I found at a re-sale shop!  I had my neighbor monogram it (it’s dangerous having a neighbor who can monogram!!) and LOVE the end result!  I think Hadley will be wearing this all summer!

IMG_2099

  • My rose bushes look like this a couple times a year – I wish they stayed like this year round!  It’s so nice to have some color back there!

IMG_2107

  • I have been trying to find the perfect “all-season” wreath for a long time now and finally just decided to go grab a grapevine wreath from Hobby Lobby and tie some burlap on it!  I really love it and am wondering why it took me so long to do this!

IMG_2114

  • I’ve had these plastic bins just sitting in a cabinet waiting to help organize our pantry for about a month now.  I finally decided to make some chalk-labels for them and started organizing!  Again, why did I wait to do this?  It seriously took me no time at all and makes the pantry look so much neater.  It’s a work in progress, which is why you’re not seeing the whole pantry, but it’s been such a simple makeover.

IMG_2119IMG_2121

If you follow me on twitter or instagram, you may have already seen a couple of these, but for those of you who don’t…

  • At Hadley’s 15 month appointment while we were waiting for the doctor, I pulled my phone out to take a picture.  I asked Hadley to smile and she gave me such a cute little fake grin – she cracks me up

IMG_2080

  • I love this picture of my two favorite people walking up to church on Easter Sunday

IMG_2084

  • Someone was WIPED.OUT. after playing hard in the nursery and hardly sleeping the night before

IMG_2089

  • I was organizing Hadley’s dresser the other day and when I glanced over at her to see what was keeping her so quietly occupied, I found her sorting her handbands on her arm.  She might have gotten a bit of her momma’s OCD.

IMG_2100IMG_2112

  • Today we played out in the driveway with sidewalk chalk – I’m pretty sure more of it wound up in Hadley’s mouth or on her little tush than actually on the driveway, but either way, we had fun :)  (P.S. that’s a mum mum in her mouth in that first picture in case you were wondering)

IMG_2122IMG_2126

Hope y’all have a wonderful weekend!  We’re waiting for my sister & brother in-law to get here for a fun weekend with family!  Happy Friday!


Pin It!

Wednesday, February 1, 2012

How to Sew a Pillow Cover with Flanges

As a part of our master bedroom makeover, I bought fabric to make my own euro shams (with some encouragement from Courtney).  Mind you, I’d never made euro shams before, let alone sewn a throw pillow, but with the help of some googling, I managed to figure it out and thought I’d share a quick how-to for anyone else wanting a quick and easy change for your room!
I have to give credit to Meredith, who posted a tutorial for the euro shams she did for their bedroom.  She made it easy-peasy! 
IMG_4509
Step 1.  First, you need to decide on what size your pillow cover will be.  I was making euro shams, which are typically 26x26, so I started with that.  Then added a few inches all around for the flanges (I wanted mine to be around 2 1/2-3 inches wide), then added another 1 1/2 inches for seam allowances, so I came to 32 x 32.
  • Because I was using expensive fabric, I decided to back it with a less expensive twill.  I wanted an envelope closure, so I cut 2 pieces out of the twill that were 32 x 18 (I wanted the “envelope” part to overlap – 18 + 18 = 36 which equals about 4 inches overlap). 
  • {keep in mind that you’ll want to finish the edges of your back pieces, so make sure to include enough fabric for your seam allowances, too!}
IMG_4472
{at this point, I was following the other tutorial which says to place your fabrics right sides together and pin around the edges, so I did.  Nevermind the fact that she was using curtain panels which already had finished edges, so I had to un-pin everything to finish the edges of my 2 back pieces.}
Step 2: (If you don’t already have finished edges where the envelope closure will be, hem those now!), then place fabrics right-sides together and  pin all around the edges.  {Tip: If your pins are perpendicular to the direction you’ll be sewing, you can sew right over them without having to remove them as you go!}
IMG_4480IMG_4481
IMG_4477

Step 3:  Sew along all 4 sides of your fabric (with right-sides together).  Make sure to  back-stitch a few times where your envelope closures meet as they will get the most wear & tear.
IMG_4485
Step 4: Turn your pillow case right side out and press the edges {and anywhere else that may need pressing}. 
SIDENOTE:  If you don’t want flanges, you are DONE!  It seriously takes no time at all to do just a basic cover! 
IMG_4488
Here’s what the back looks like at this point…
IMG_4487
Step 5:  Measure out how large you want your flanges to be and pin or mark your line to sew.  {This is a good time to double check how large you want the actual pillow casing to be – I wanted mine to be around 25 1/2 inches, so I just made the flanges as large as they needed to be for my pillow to fit.}  I made 3 of these, and each one is just a tad different due to how much seam allowance I ended up using.  No worries, you can’t tell once they’re finished and on the bed!
IMG_4491
The first pillow I made, I pinned all the way around for my 3 inch flange.  That took for.ev.er, so I decided to try something else for the remaining two pillows: chalk!  I just made little marks as I measured and connected them with chalk.  It wipes off the twill really easily (and white chalk on white twill can hardly be seen anyway). 
IMG_4507
And, learn from my experience…
IMG_4499
Wah, wah.  Thankfully I had enough of the twill fabric to cut another back piece. 
IMG_4500IMG_4502
Wah. Wah. x2.  I finished sewing an entire edge before I realized my bobbin was empty and I had just wasted the last 5 minutes.  Then I couldn’t remember how to wind a new bobbin so I had to get out my manual.  Am I the only one who has to use my manual every time I sew?
IMG_4503
If you can avoid the mistakes I made, you can have new pillows for your bed in about 30 minutes!  Ta da! 
IMG_4492


Growing Home


NightOwlCrafting


Home Stories A2Z
Chic on a Shoestring Decorating

Pin It!

Monday, January 23, 2012

Hadley’s First Birthday Party–A Winter ONEderland!

With the craziness of the holidays, we decided to throw Hadley’s birthday party a couple weeks after her actual big day.  (Not to mention that having it later meant that some of our closest friends – and Hadley’s first friend – who live in China right now, were able to be here for the big day!)
I decided on a Winter One-derland theme for her party, and in true Texas fashion, we had a beautiful, albeit windy, day in the mid-70s.  Go-figure!  This time last year we had had a couple days of snow!  It was wonderful, though, to be able to use our back patio, as our house was not made for entertaining 20+ people!  
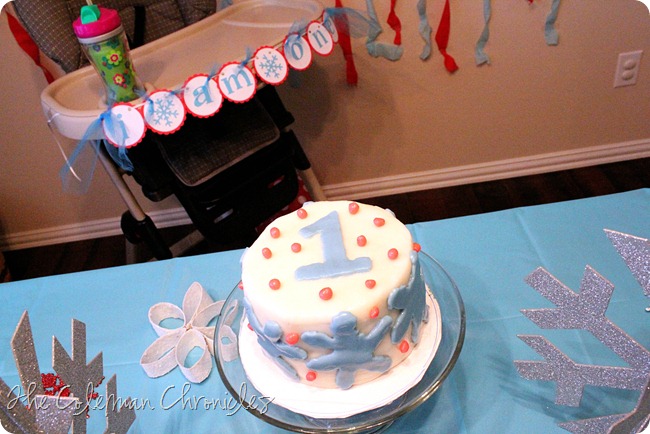
Before I dive into the pictures, I want to make sure to include thank-yous to our family and friends.  I could NOT have thrown this party without the massive amount of help I received!  My mom came up  4 days early to help with Hadley and getting the house in order, my dad MADE Hadley’s smash cake (he also made the cake for our wedding, which you can see in this post – DELISH and such a special treat to have it homemade with love).  My sister and soon-to-be brother-in-law were huge helps as well – I wouldn’t have any pictures of the day if it wasn’t for Katie – and the BBQ wouldn’t have been nearly as tasty without Eric’s help!  My in-laws came a little early as well and helped arrange the tables and cut up vegetables – not to mention bringing the adorable mason jar server for the lemonade!  And my dear friend Courtney came early to help with the decorations!  THANK YOU. THANK YOU. THANK YOU to all of you!  And to everyone who came – we feel so, so blessed by the friendships we have in you! 
Ok, on to the pictures!  I had every intention of getting out my good lens and snapping some artsy, beautiful pictures, but of course I didn’t take one.single.picture on my camera!  Thankfully, my sister took pictures as we were setting everything up! 
First of all, this was the invite I designed… (I blocked out the address info, just so you didn’t think that was all white space!)
hadleyinviteportrait copy2
IMG_9163
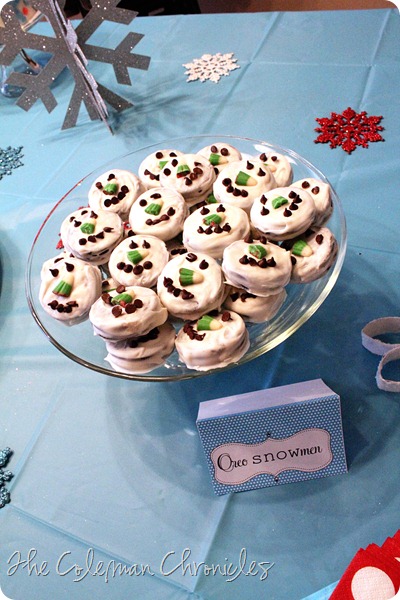
The dessert table…  We had cupcakes, “ice cubes” (marshmallows dipped in white chocolate, dipped in sprinkles), chocolate covered oreos, and “frosty truffles” (cake batter truffles). 
IMG_9129IMG_9130IMG_9131IMG_9132IMG_9133IMG_9136
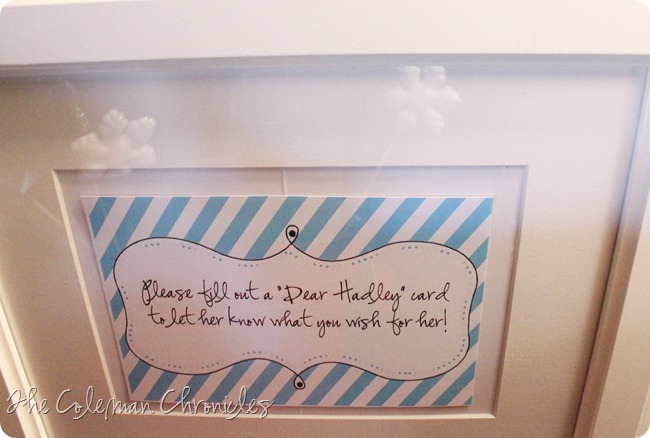
This was the table by the front door.  One of my favorite things that we did was have the guests fill out a “Wishes for Hadley” form (thank you Pinterest!).  I will forever treasure these cards!  The favors were cookies that I set out towards the end of the party with a card that read “Thank you SNOW much!”
IMG_9139
IMG_9165
IMG_9164
IMG_9143
IMG_9167
IMG_9166
At the food table, we had BBQ chicken sandwiches, homemade potato salad (thanks mom!), fresh fruit, and veggies and dip (“veggies dipped in snow”). 
IMG_9145IMG_9146
I also set up a hot chocolate bar with marshmallows and chocolate chips as add-ins. 
IMG_9160
IMG_9169
A little behind the scenes look – Eric is shredding the chicken while my dad makes the hot chocolate!
IMG_9144
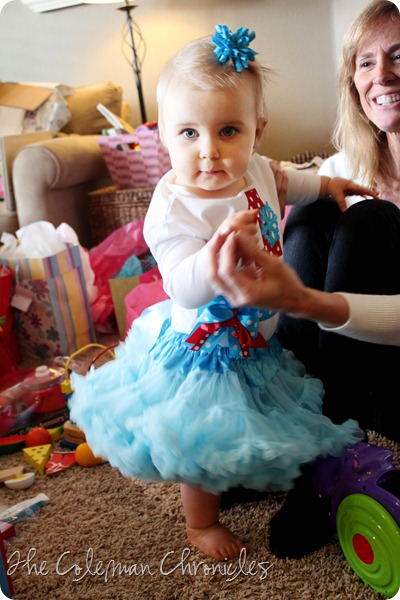
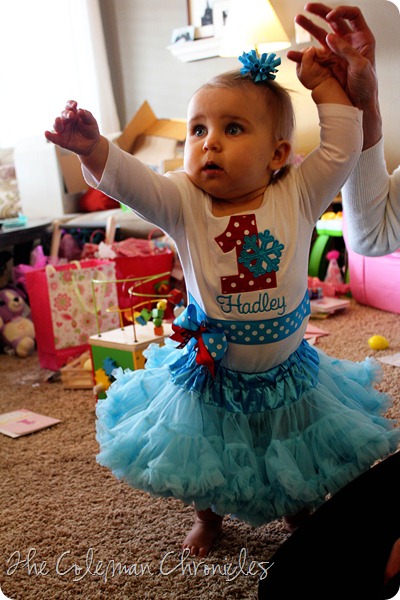
And, last but not least, some pictures of the birthday girl!
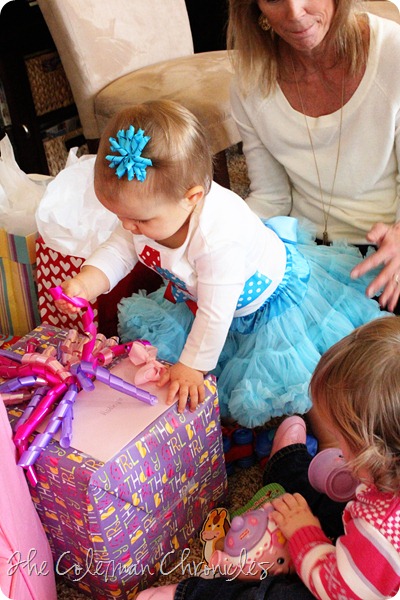
Checking out her presents with Brynn…
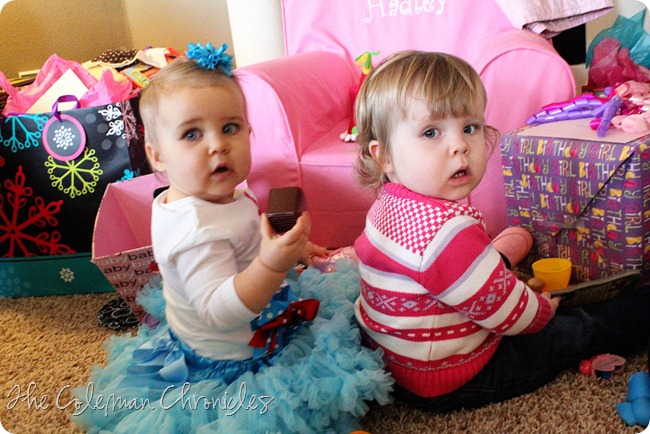
IMG_9149IMG_9154IMG_9176IMG_9181IMG_9202
When it came time for her “smash” cake (which I put in quotations, because she was SO not into smashing the cake, whatsoever), she was a little less than enthused.  She loved being sang to, and loved all the attention, but I had to break the cake up for her and even then she took a little taste and decided she wasn’t in the mood for cake.  She did, however, love the banana filling that her Poppie put in the middle layer for her! 
IMG_9231IMG_9232IMG_9234IMG_9236IMG_9241
We had her shirt made by the wife of one of Matt’s co-workers!  She has an adorable etsy shop called LilyBella’s Boutique and she did such a great job.  Thank you Elizabeth! 
All-in-all it was SO much fun throwing this party, but I am exhausted!  Thank you, again, to everyone who came to help us celebrate!  We love you all! 
Sources:
All the paper products (labels, banners, cupcake toppers etc…) were homemade with my new Silhouette machine!  I had planned to make stickers for the cups, but for some reason, I couldn’t get the print & cut feature to work with sticker paper. 
Cupcakes: Sam’s – delicious cupcakes at only $13 for 30!
Cookies: A local bakery
Hadley’s shirt: LilyBella’s Boutique
Decorations: Most of the snowflakes were found either in the dollar section at Target or at the Dollar store!
Oh and one more picture… after everyone had left we realized we didn’t take a picture of the three of us!  So, I set up the self-timer on my camera and we stuck Hadley back in her high chair for this picture… ha!
IMG_4370


Linking up with:


Pin It!
Related Posts Plugin for WordPress, Blogger...